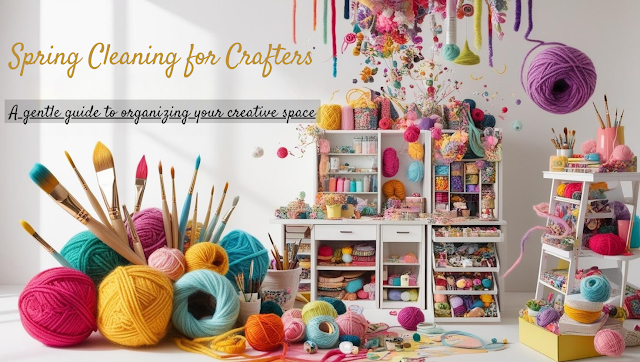
Spring Cleaning for Crafters: A Gentle Guide to Organizing Your Creative Space

Hey there, fellow crafters! 🌼It’s time to embrace the arrival of spring! And what better way to welcome the season than with a good old-fashioned spring cleaning? This year, let’s focus on our craft areas—those magical spaces where creativity flows and ideas come to life. For those of us living with chronic illness, organizing and decluttering can be a bit of a challenge, but it’s also a fantastic opportunity to refresh our creative environments. So, grab a cup of tea, and let’s dive into some practical and mindful tips for sprucing up our craft rooms, yarn stashes, and notion bags!
1. Start with a Plan
Before you dive headfirst into the chaos, take a moment to assess your space. Here’s how to get started:
- Empty and Edit: Clear out your craft room completely. This might feel overwhelming, but it’s essential to see everything you have. As you do this, start sorting items into categories: keep, donate, and toss.
- Make a Plan: Think about how you want your space to function. Do you need more storage? Would a different layout help? Sketch out a rough plan to visualize your ideal setup.
- Create Zones: Designate specific areas for different types of crafts. For example, have a section for yarn, another for paper crafts, and a space for tools. This way, everything has its place, and you can easily find what you need when inspiration strikes!
2. Organizing Your Craft Room
Now that you’ve got a plan, it’s time to organize! Here are some ideas to help you create a functional and inspiring craft space:
- Use Clear Storage Bins: Invest in clear bins to store your supplies. This way, you can easily see what you have without digging through piles. Label each bin for even easier access!
- Kallax Shelves: If you’re looking for a stylish storage solution, consider Kallax shelves. They’re versatile and can hold everything from fabric to yarn. Plus, they look great in any room!
- Create a Craft Station: Designate a specific area for your most-used supplies. This could be a small table or a cart that you can easily move around. Having a dedicated space can make crafting more enjoyable and less stressful.
3. Taming the Yarn Stash
Ah, the yarn stash! It can be both a blessing and a curse. Here’s how to tackle it:
- Sort by Weight and Color: Organize your yarn by weight (e.g., worsted, bulky) and color. This not only looks pretty but also makes it easier to find the perfect yarn for your next project.
- Clean Your Yarn: If you have second-hand or dusty yarn, consider giving it a gentle wash. Soak it in lukewarm water for about 15 minutes, then squeeze out the excess water without agitating it. This will help refresh your stash!
- Swap or Donate: If you have yarn you know you won’t use, consider hosting a yarn swap with friends or donating it to a local charity. It’s a great way to let go and make someone else’s day!
4. Notion Bags Organization & Revamping Your Crochet Bags
Notion bags can quickly become a black hole for supplies. Here’s how to keep them tidy:
- Use Smaller Pouches: Invest in smaller zippered pouches to categorize your notions. For example, have one for sewing tools, another for knitting accessories, and so on. This way, you won’t have to dig through a jumble of items to find what you need.
- Label Everything: If you’re using clear bags, label them! This will save you time and frustration when you’re in the middle of a project.
- Sort and Store: Empty your crochet bag and sort through the contents. Keep only the essentials: your favorite hooks, a few skeins of yarn, and any ongoing projects. Everything else can be stored away or donated.
- Use Organizers: Invest in a good crochet bag organizer or use smaller pouches to keep your hooks and accessories in check. This way, you can grab what you need without digging through a tangled mess.
- Keep It Light: Remember, your crochet bag should be easy to carry. If it’s too heavy or stuffed, it might discourage you from taking it on the go. Keep only what you need for your current projects.
5. Mindful Decluttering with Chronic Illness in Mind
Cleaning and organizing can be physically demanding, especially for those of us with chronic illnesses. Here are some tips to make the process easier:
- Take Breaks: Don’t try to do everything in one go. Set a timer for 15-20 minutes of organizing, then take a break. Listen to your body and rest when you need to.
- Ask for Help: If you have friends or family who can lend a hand, don’t hesitate to ask! Sometimes, a little extra support can make a world of difference.
- Be Kind to Yourself: Remember, it’s okay to let go of items that no longer serve you. Crafting should be a joy, not a burden. If something feels overwhelming, take a step back and revisit it later.
- Reflect on Your Journey: Think about why you started crafting in the first place. If certain items no longer inspire you, it’s okay to part with them. Remember, it’s about making space for new ideas and projects!
- Set a Limit: If you’re struggling to let go, set a limit for yourself. For example, if you have ten skeins of yarn, challenge yourself to keep only five. This can make the decision easier.
- Celebrate Your Progress: After you’ve decluttered, take a moment to appreciate your hard work! Enjoy your newly organized space and the fresh start it brings.
Conclusion
Spring cleaning doesn’t have to be a daunting task. With a little planning and a mindful approach, you can transform your craft space into a haven of creativity and inspiration. So, as we welcome the first week of spring, let’s embrace the opportunity to refresh our craft areas, making them more functional and enjoyable for our creative journeys. Happy organizing, and may your spring be filled with beautiful projects and joyful crafting! 🌷
What are your favorite tips for organizing your craft space? I’d love to hear your thoughts!


Comments
Post a Comment